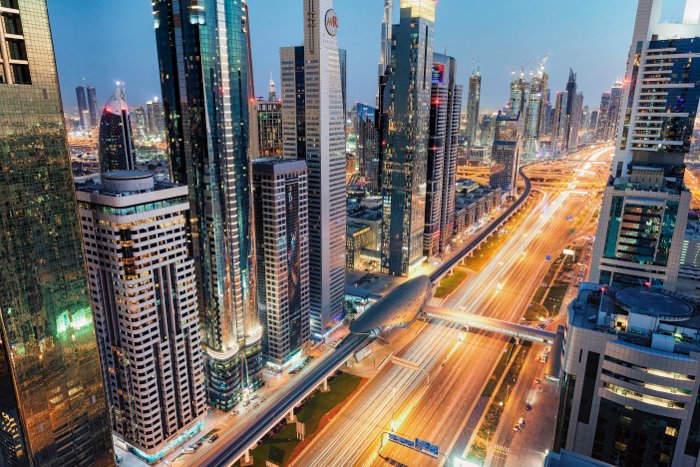
One of the vital pleasing elements of pictures is sitting down on the finish of the day to decide on your finest photographs. The easy choice of your favorite photographs isn’t the tip of the story although, there may be nonetheless publish processing to be performed!
Each picture can profit from additional work in your favorite enhancing suite, even when that’s just a few primary enhancements. On this article you’ll uncover ten superb publish processing strategies, which you should utilize to convey your journey photographs to a different stage!
What Enhancing Software program Ought to You Use?
There’s a plethora of applications you should utilize to edit your photographs, and to some extent what you employ will rely on the platform you’re utilizing. It’s finest to do your publish processing on a pc, in fact, as it is going to supply larger processing energy for these operations that require some heavy lifting.
That stated, on the go enhancing on pill gadgets is turning into more and more widespread, and catered for by corporations like Adobe.
These seeking to get the very best out of their publish processing must also be photographing in RAW versus JPEG. The RAW format is taken into account the digital detrimental, and is a lot better for working with in publish manufacturing. There are various applications you should utilize to edit your photographs, here’s a choice of six which you would select to make use of.
Lightroom
Lightroom has been available on the market for a few years now. Initially marketed as a extra consumer pleasant software than Photoshop, that is nonetheless nonetheless a really highly effective program. Nearly each photographer on the market makes use of this program for almost all of their enhancing.
Photoshop
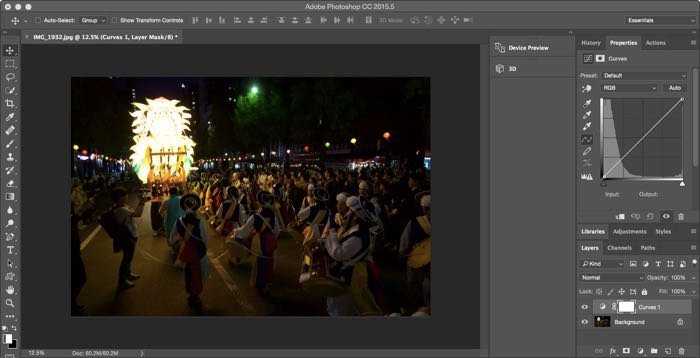
That is essentially the most highly effective enhancing program on the market. These wishing to make some easy edits to their pictures may not want to make use of Photoshop. Nevertheless, you’ll be able to actually take your photographs to the subsequent stage by studying the potential of this program.
When photographing in RAW the pre-Photoshop program of Adobe Digicam Uncooked can even enhance your journey photographs.
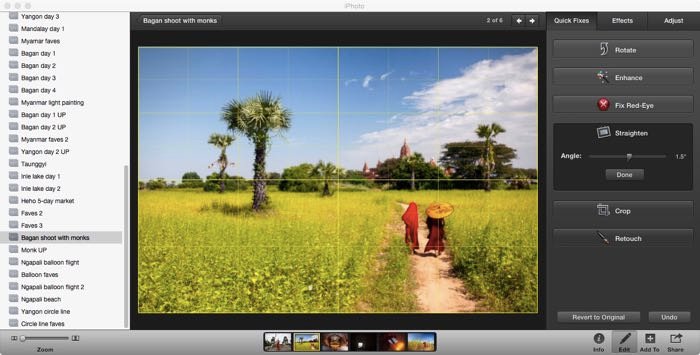
iPhoto/Images
This comes customary with all Apple computer systems. The older model is iPhoto, which has now been outdated by Images. This can will let you cowl all of the fundamentals like blemish elimination, distinction, saturation and horizon line correction.
It’s restricted in what it may do although, so for higher outcomes it’s suggested you employ Photoshop or Luminar.
Luminar
This was made in response, and as a substitute, to Photoshop. It’s an Apple based mostly program, so these with a Mac who need one thing with a bit extra punch can look to Luminar.
It is a stable program that means that you can enhance your photographs. Whether or not you select this or Photoshop is a private choice.
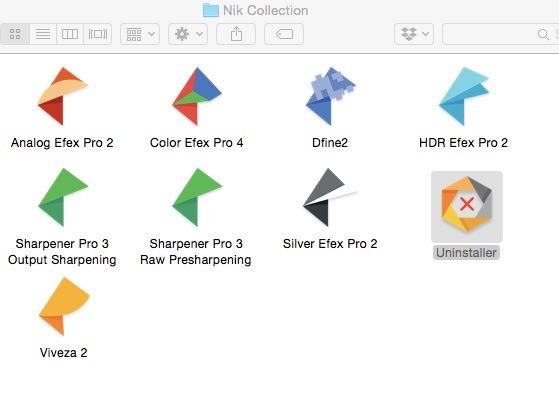
Nik Assortment
It is a nice program, that was out there as a free obtain by means of Google. It’s now been purchased by DXO, and is offered for a modest value. The truth that that is now not free is definitely nice information, as a result of will probably be developed and supported versus being allowed to die.
You need to use it as a standalone, or as a plugin for different processing platforms corresponding to Photoshop. This grew to become a go to program for a lot of photographers over time, and is extremely really useful.
Snapseed
Everybody is aware of Snapseed, it’s a terrific program for on the go pill or telephone based mostly enhancing. It’s owned by Google, who purchased the aforementioned Nik Assortment to get that program’s algorithms, so it may very well be utilized to a cellular app-based platform.
These smartphone photographers on the market will know it is a nice utility for his or her publish processing work, and it’s easy to make use of.
Put up-Processing Strategies
Now that you’ve got a grasp on which publish processing program to make use of, it’s time to maneuver on to strategies. These vary from easy fixes, to extra sophisticated procedures that require much more time to be taught, and care when making use of them.
1. Cropping
Utilizing the crop software to regulate your journey photographs is a good way of drawing consideration to the necessary a part of the picture. The vast majority of the applications talked about above have a cropping facility, which you should utilize for this adjustment.
You’ll use this for quite a few causes, let’s have a look at these.
- Zooming in – That is the results of lack of attain along with your longest focal size lens. The framing of the picture would possibly require an extended focal size than you may have, and whereas not preferrred, cropping in post-processing is an answer right here.
- Sq. or pano – The crop most cameras provide you with is kind of a normal 6″ by 4″ picture. There will probably be occasions you’ll need to have a special crop although, so as soon as once more this may be produced in publish processing.
- Take away components – Cropping is a good way to take away components that you just now not need within the body. After all it’s higher to border your picture in digicam with out these components, however post-processing provides you one other probability to get this proper. The method of correcting your photographs on this approach can even assist practice your eye, in order that subsequent time you get it proper in digicam.

2. Sharpening
Sharpness in your pictures is a fascinating trait. A lot time is used to debate how sharp a lens is. Put up manufacturing may also result in even sharper photographs!
Generally you’ll need to use this to sharpen up panorama and architectural photographs, and native changes are additionally a good suggestion. Let’s have a look at three applications you should utilize to sharpen your photographs. In all circumstances, sharpening your photographs will add noise to the picture, one thing you’ll need to take away later in processing.
- Nik Assortment – This bundle has a number of choices to sharpen your journey photographs. You need to use the RAW pre-sharpener after which the output sharpener. These each permit for native changes by means of the management level choices. Alternatively use Shade Efex, and the element extractor filter. The element extractor is a robust filter, so average the extent of adjustment you employ with it.
- iPhoto – This program presents a easy slider to extend sharpness. It’s discovered beneath edit>modify>sharpness.
- Photoshop – This program presents a number of filter choices that you should utilize to extend sharpness. You may also use layer masking so as to add these results solely to the areas you want to sharpen. An instance of a filter you should utilize for sharpening is unsharp masks. To search out this filter go to filter>sharpen>unsharp masks.
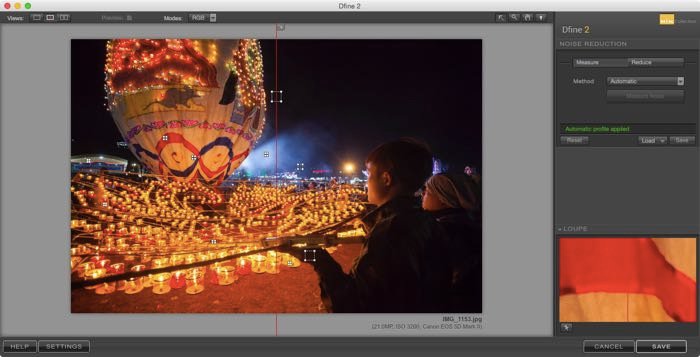
3. Noise Discount
Have you ever photographed late at night time with a excessive ISO? Maybe you had been taking an extended publicity picture? In every case the probabilities are your picture will include noise. Now digicam sensors are enhancing on a regular basis, so the newer your digicam is the much less work you will have to do to take away noise. The intention along with your picture is to create a pointy picture, with out a number of noise in it. Whereas iPhoto has a function in it to take away noise, you’re going to see three higher choices.
- Nik efex – This comprises a program known as Dfine2, which is a robust noise discount program. It means that you can make native changes. This allows you to retain the sharpness of issues like buildings, whereas eradicating noise from the sky.
- Noise ninja – A preferred program amongst many photographers for noise discount is noise ninja. This works as a plugin for Photoshop.
- Adobe digicam RAW – This pre-editing program for Photoshop means that you can put together your photographs, previous to enhancing them. One of many features is noise discount.
4. Horizon Line Correction
Getting the horizon line straight is a primary prerequisite of any good picture. Taking the time to be sure you do that in digicam will save time in publish processing, and forestall you from dropping picture measurement.
When it is advisable to appropriate the horizon line by rotating the picture in publish processing this system will routinely crop in for you, so that you’ll lose the sting of your journey photographs. There are two situations when you will have to appropriate the horizon line, and they’re as follows.
- Correcting a mistake – Whereas not preferrred, generally all of us lose the horizon line when taking a photograph. Correction by picture rotation is a simple repair provided by all primary software program enhancing applications.
- Broad angle distortion – It is a barely extra sophisticated repair, and the really useful methodology of fixing this requires Photoshop. That is prompted while you use a large angle lens, and it makes constructing bow resulting from distortion. These wishing to be taught this course of can view this glorious video.
5. Vignetting
Including a vignette is usually a actually nice technique to focus the attention on the necessary space of the picture, which you want the viewer to focus on. There are numerous methods this may be performed, with essentially the most primary merely lightening the centre, and darkening the perimeters.
Whereas there are various methods to attain this impact, top-of-the-line applications for doing that is Nik Shade Efex. On this program you’ll want to pick the filter “darken/lighten centre.”
This filter permits you extra management over how the vignette is utilized. Maybe you need the vignette to be off centre? You’ll be able to simply repair this by deciding on the “place centre” possibility, and deciding on the realm you need the vignette to be centred on.
Are the perimeters too darkish, or the centre too brilliant? Simply fastened by adjusting the sliders that management how sturdy your vignette will probably be. Lastly are there particular areas of the picture that want additional work? Use the management factors to selectively take away the energy of the filter from that portion of the picture.

6. Saturation
That is the way in which you’ll be able to add extra punch to your picture, and make it extra vibrant. A phrase of warning although, including an excessive amount of saturation is a assured technique to damage your picture. This all stated, making your picture standout is the intention, so including somewhat distinction is commonly a good suggestion.
Eradicating saturation is in fact one technique to convert your {photograph} to black and white, although this by itself gained’t lead to a robust black and white picture.
- Easy adjustment – These desirous to make a easy adjustment can use their software program’s saturation adjustment software, typically a sliding bar. It’s only a easy case of shifting this forwards and backwards as wanted.
- Extra superior – Nik colour efex has some nice filters that can be utilized together, and with native enhancing to supply nice outcomes. A mixture of “pro-contrast” and “brilliance/heat” will enhance your photographs rather a lot.
7. Highlights and Shadows
Gentle ranges throughout a photograph can fluctuate, resulting in areas of your picture which might be both too brilliant, or too darkish. This may be fastened through the use of sliders that modify highlights, or shadows.
Adjusting the highlights will make the intense areas of your picture much less brilliant. Adjusting shadows will brighten up the darker elements of your picture.
All enhancing software program will supply this as customary, however these are crude changes utilized throughout the entire picture.
A a lot better technique to modify highlights and shadows is thru Photoshop, the place you’ll be able to apply layer masks. This methodology harks again to the outdated darkish room strategy of dodging and burning your photographs. Dodging would scale back mild from an space of the picture, whereas burning would ass extra mild.
Let’s have a look at how these could be utilized to the digital age.
- Burning – In Photoshop choose layer>new adjustment layer>curves. Now drag the curve upwards. This can brighten your picture. Now you’ll want to cover this adjustment by going to picture>adjustment>invert. Subsequent your curve adjustment layer is black, and to convey again this adjustment you’ll want to make use of the paint software. You’ll use the paint software to color the black layer masks white, and this can reveal the layer. You’ll be able to modify the energy of the comb, so that you steadily brighten the realm’s of the picture which might be too darkish.
- Dodging – As soon as once more choose layer>adjustment layer>curves in Photoshop. To dodge you’re going to pull the curve downwards, and this can darken the picture. After that repeat the above steps by inverting the layer, and utilizing the paint brush to selectively darken space’s of your picture as wanted.
8. Distinction
Like including saturation to a scene, including extra distinction can actually make your picture shine. Including an excessive amount of, nonetheless, can have a detrimental impact on the picture, and the way others obtain it.
There are these photographs that actually work nicely with additional distinction, like silhouettes, and there are people who don’t work as nicely. Like many areas of publish processing there are easy and extra superior strategies in terms of including or eradicating distinction.
- The easy repair – All enhancing software program can have a approach of adjusting distinction. The best and most simple of those is as soon as once more the slide bar. From the simplest to make use of applications like iPhoto all the way in which to superior applications like Photoshop, they are going to all have this.
- Extra superior – These wishing for somewhat extra management over the way in which distinction is utilized to a journey picture ought to look to Photoshop. You’ll must open a curve layer, and so as to add distinction you’ll make that curve into an S-curve. When you want to make these changes extra native then utilizing the black or white brush to cover or reveal the curve layer means that you can do this.

9. Digital Mixing
Anybody who does panorama, architectural, or inside pictures actually must know the right way to do digital mixing. You’ll discover that HDR isn’t listed within the ten strategies right here.
That’s as a result of digital mixing is basically handbook HDR, and when performed nicely is an enormous enchancment on HDR. Now HDR can have its followers, however there are very often flaws ultimately consequence.
Digital mixing means that you can deal with these points, and creates beautiful journey photographs. The method is just too sophisticated to interrupt down in a single sub-heading, it wants its personal article. These wishing to find out about this strategies ought to go to this web site.
This system is considerably much like quantity seven on this record, solely the outcomes are higher. The gist of the method is as follows.
- Take 3 or extra photographs on a tripod. These ought to have differing publicity values. The standard vary will probably be +1EV, 0EV and -1EV. Taking extra photographs means that you can lengthen the vary of publicity values you may have.
- Now add these journey photographs to Photoshop. These photographs will then be stacked collectively, sometimes the background picture with be 0EV, with the opposite photographs on high of that.
- The photographs above the background will then be hidden utilizing a black layer masks.
- The following step is to use luminosity masks to the background picture, so you’ll be able to choose particular areas of the picture which might be both too darkish, or too brilliant.
- Now use the white paint brush to disclose particular space’s of the +1EV picture, so you’ll be able to lighten the darkish space’s of the picture. The method is repeated for the over uncovered elements of the picture with the -1EV picture, sometimes the sky, so you’ll be able to darken this space.
10. Take away Undesirable Components
Final and certainly not least is the elimination of undesirable components out of your body. This may very well be a wire that cuts throughout the sky, or eradicating undesirable folks from a photograph as they make the body too busy.
There are two approaches you’ll be able to take. The primary is to clone out the undesirable a part of the picture. The second is to make use of the median software in Photoshop.
- Cloning – This describes a course of the place you’re taking a duplicate of 1 portion of you picture, and duplicate it onto an undesirable space of the picture. What you take away can fluctuate, it may very well be sensor mud that reveals up in your picture, or extra sophisticated components like folks or wires. The trick is discovering one other space of the picture that instantly matches the portion of the picture you need to edit.
- The median software – To do that you’ll want a tripod, and also you’ll want a number of photographs of your scene. As folks transfer round they’ll change place in your body. This lets you take away all folks out of your picture, supplying you with a a lot cleaner picture. As soon as once more it is a sophisticated course of, and it’s finest defined on this article.